Nothing ruins a set on the water faster than a snapped lace on your favorite BOA-equipped gloves or BOA water ski boot. But you don’t have to worry, fixing a BOA lace is a simple 10-minute task once you know the "U-turn" secret.
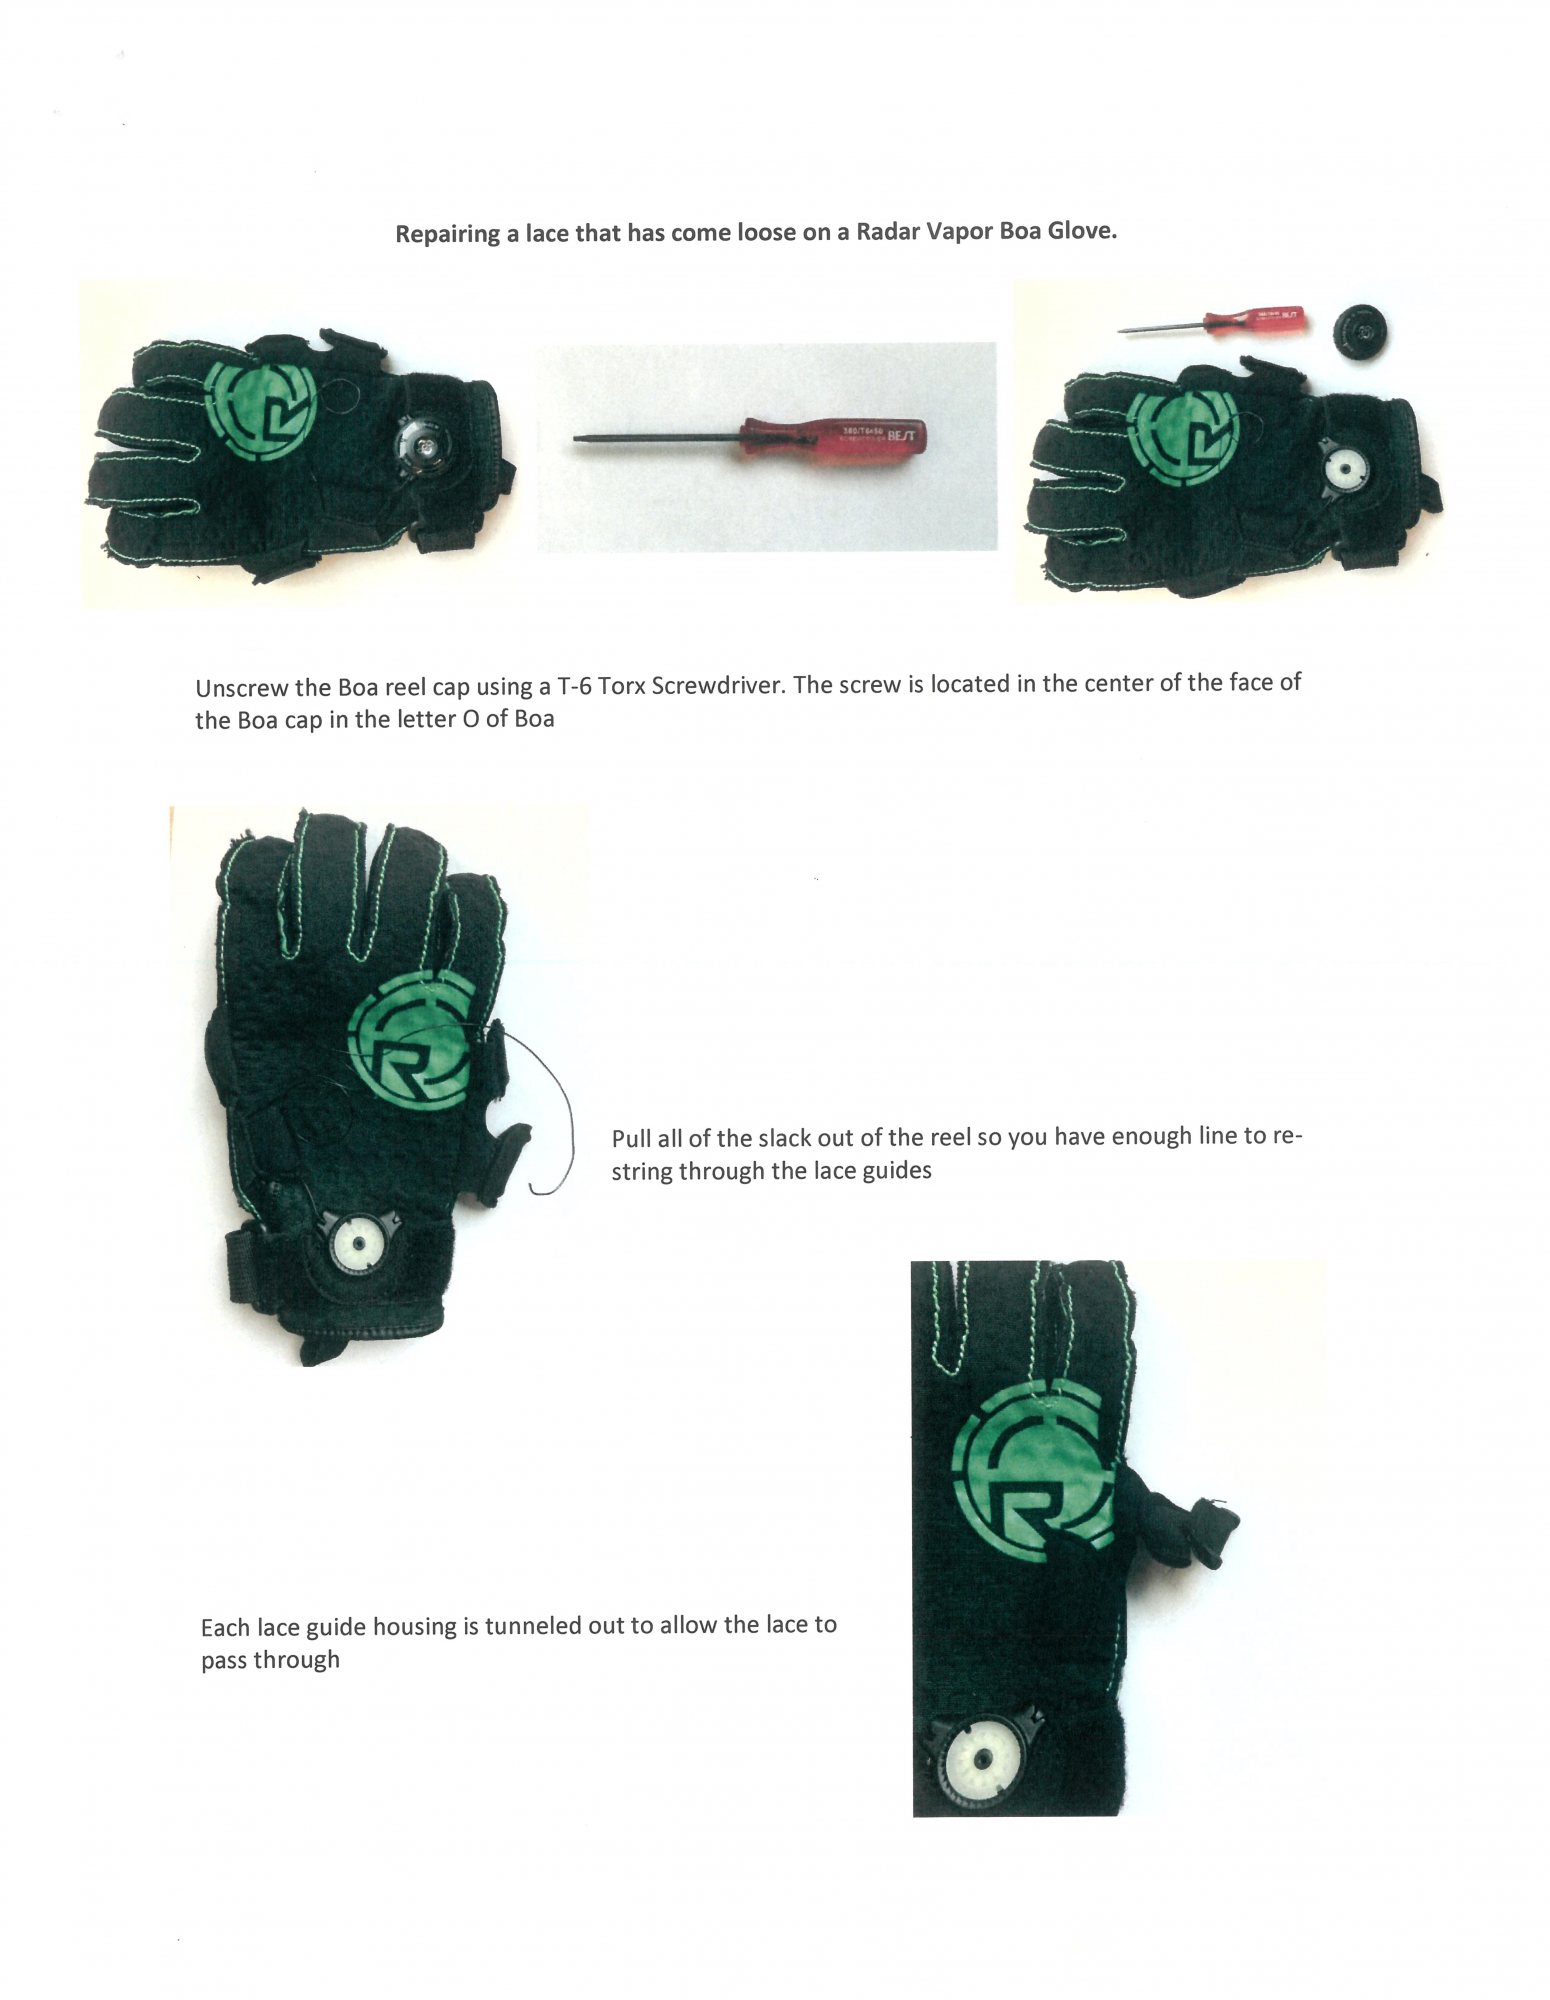
- Open the Dial: Use a small T6 Torx driver or a flat-head screwdriver (depending on your model) to remove the center screw. Pop off the dial and lift out the internal spool.
- Clear the Old Lace: Unwind any remaining broken lace from the spool. If the lace is stuck, use needle-nose pliers to pull it through the guides.
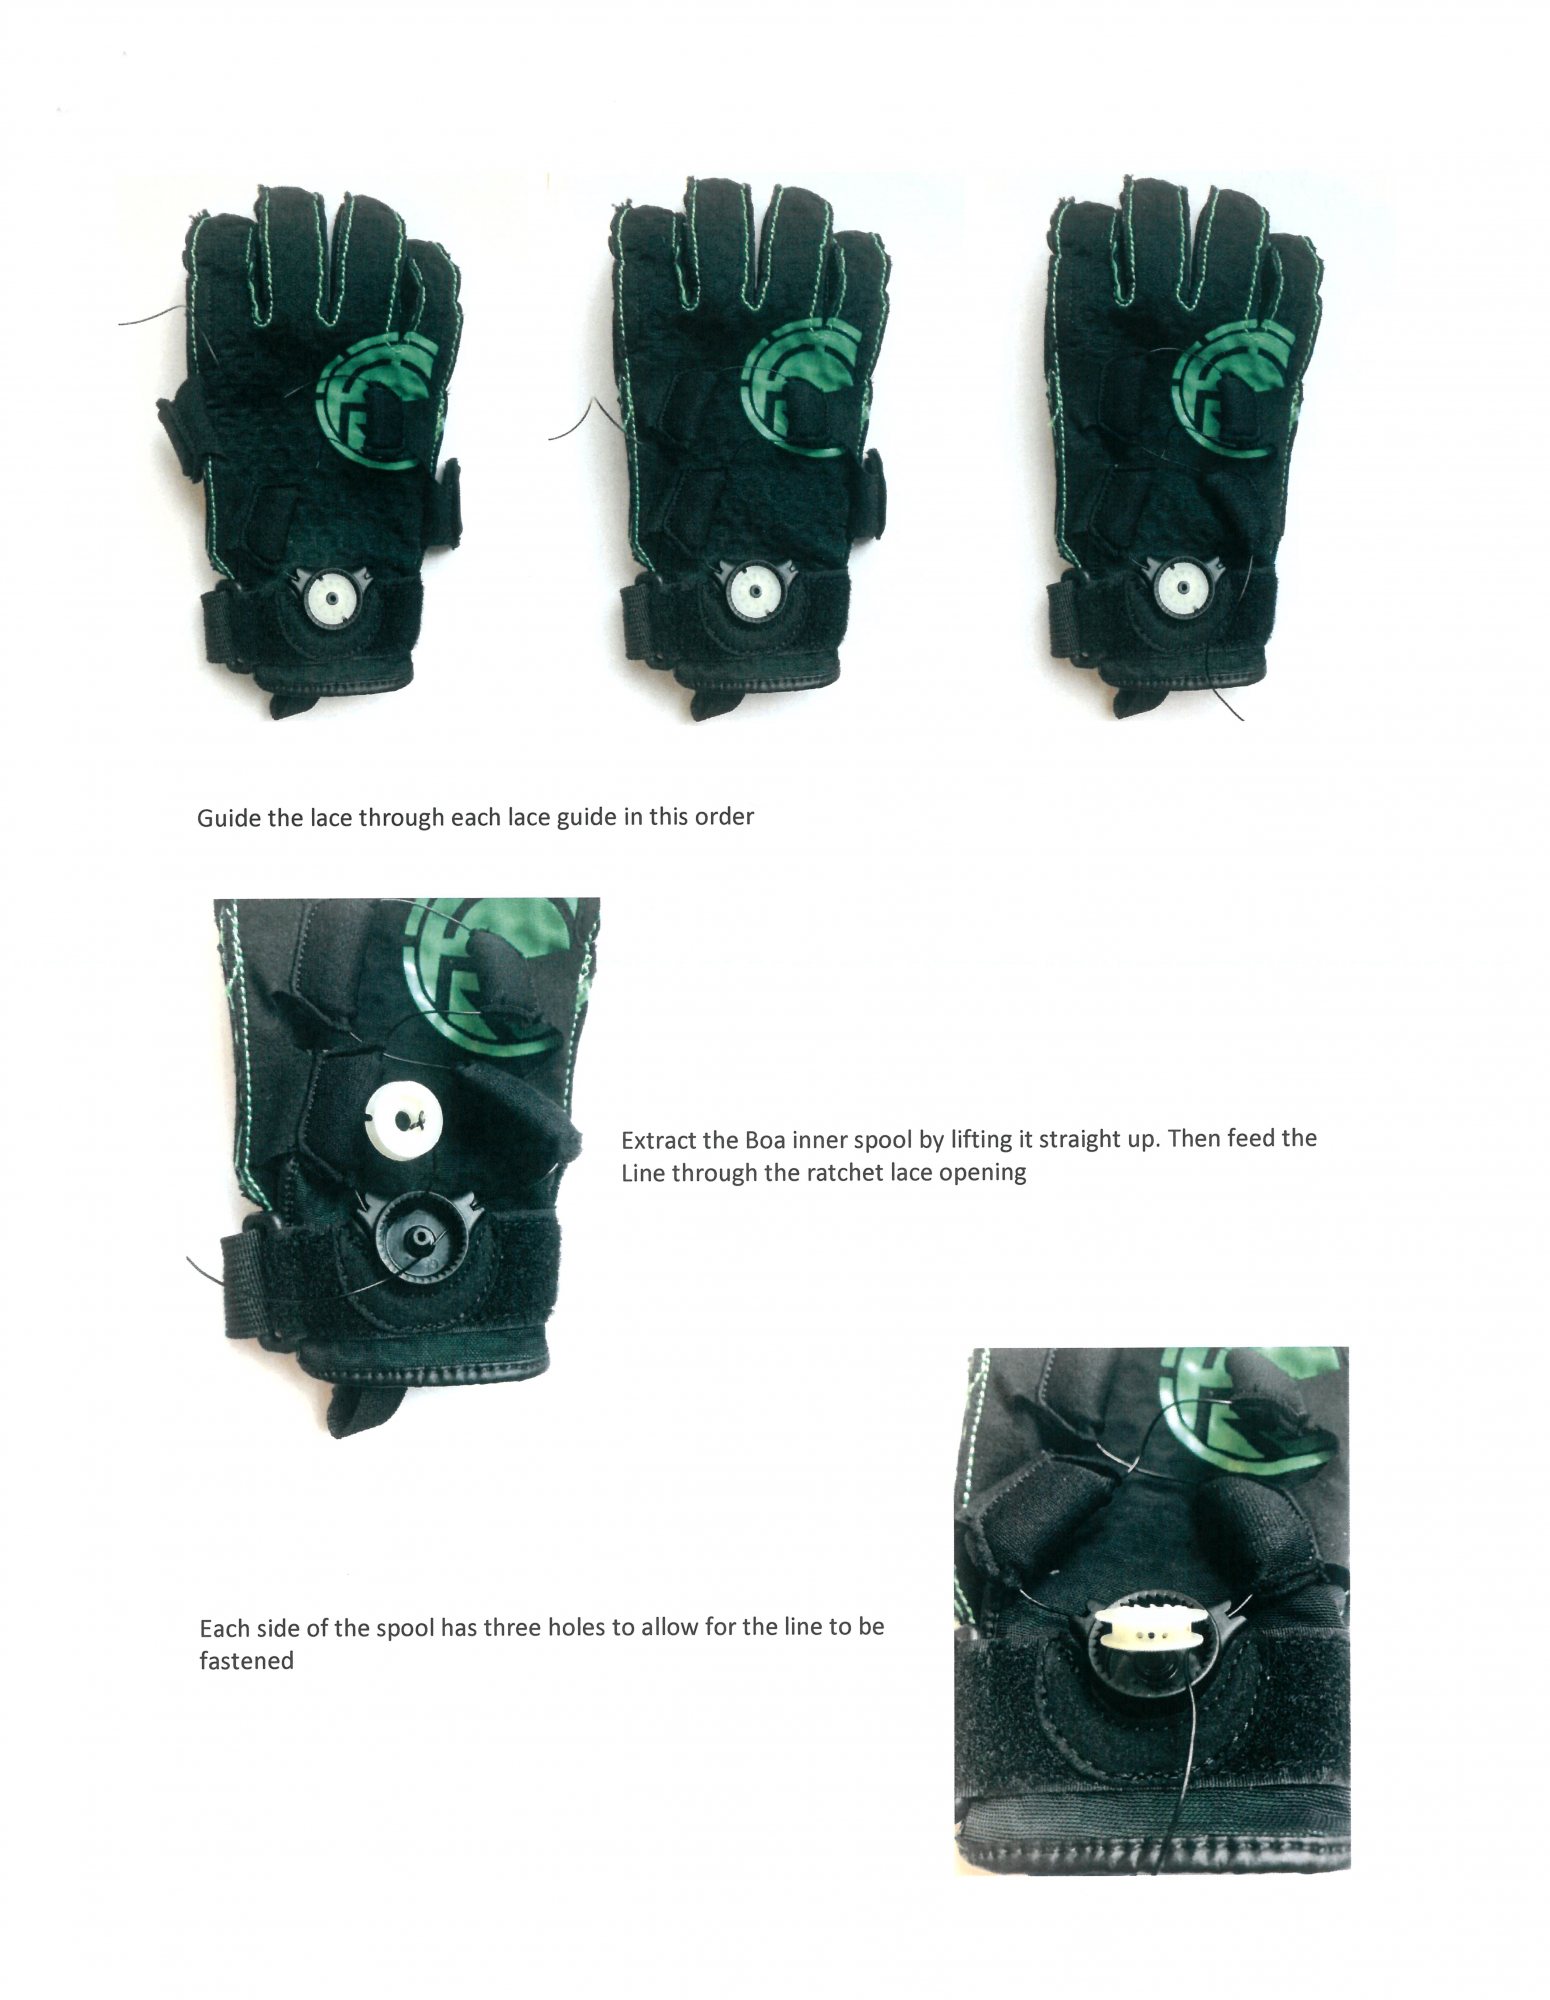
- Feed the New Lace: Thread your replacement BOA lace through the glove guides first, then feed both ends through the holes in the bottom of the BOA housing.
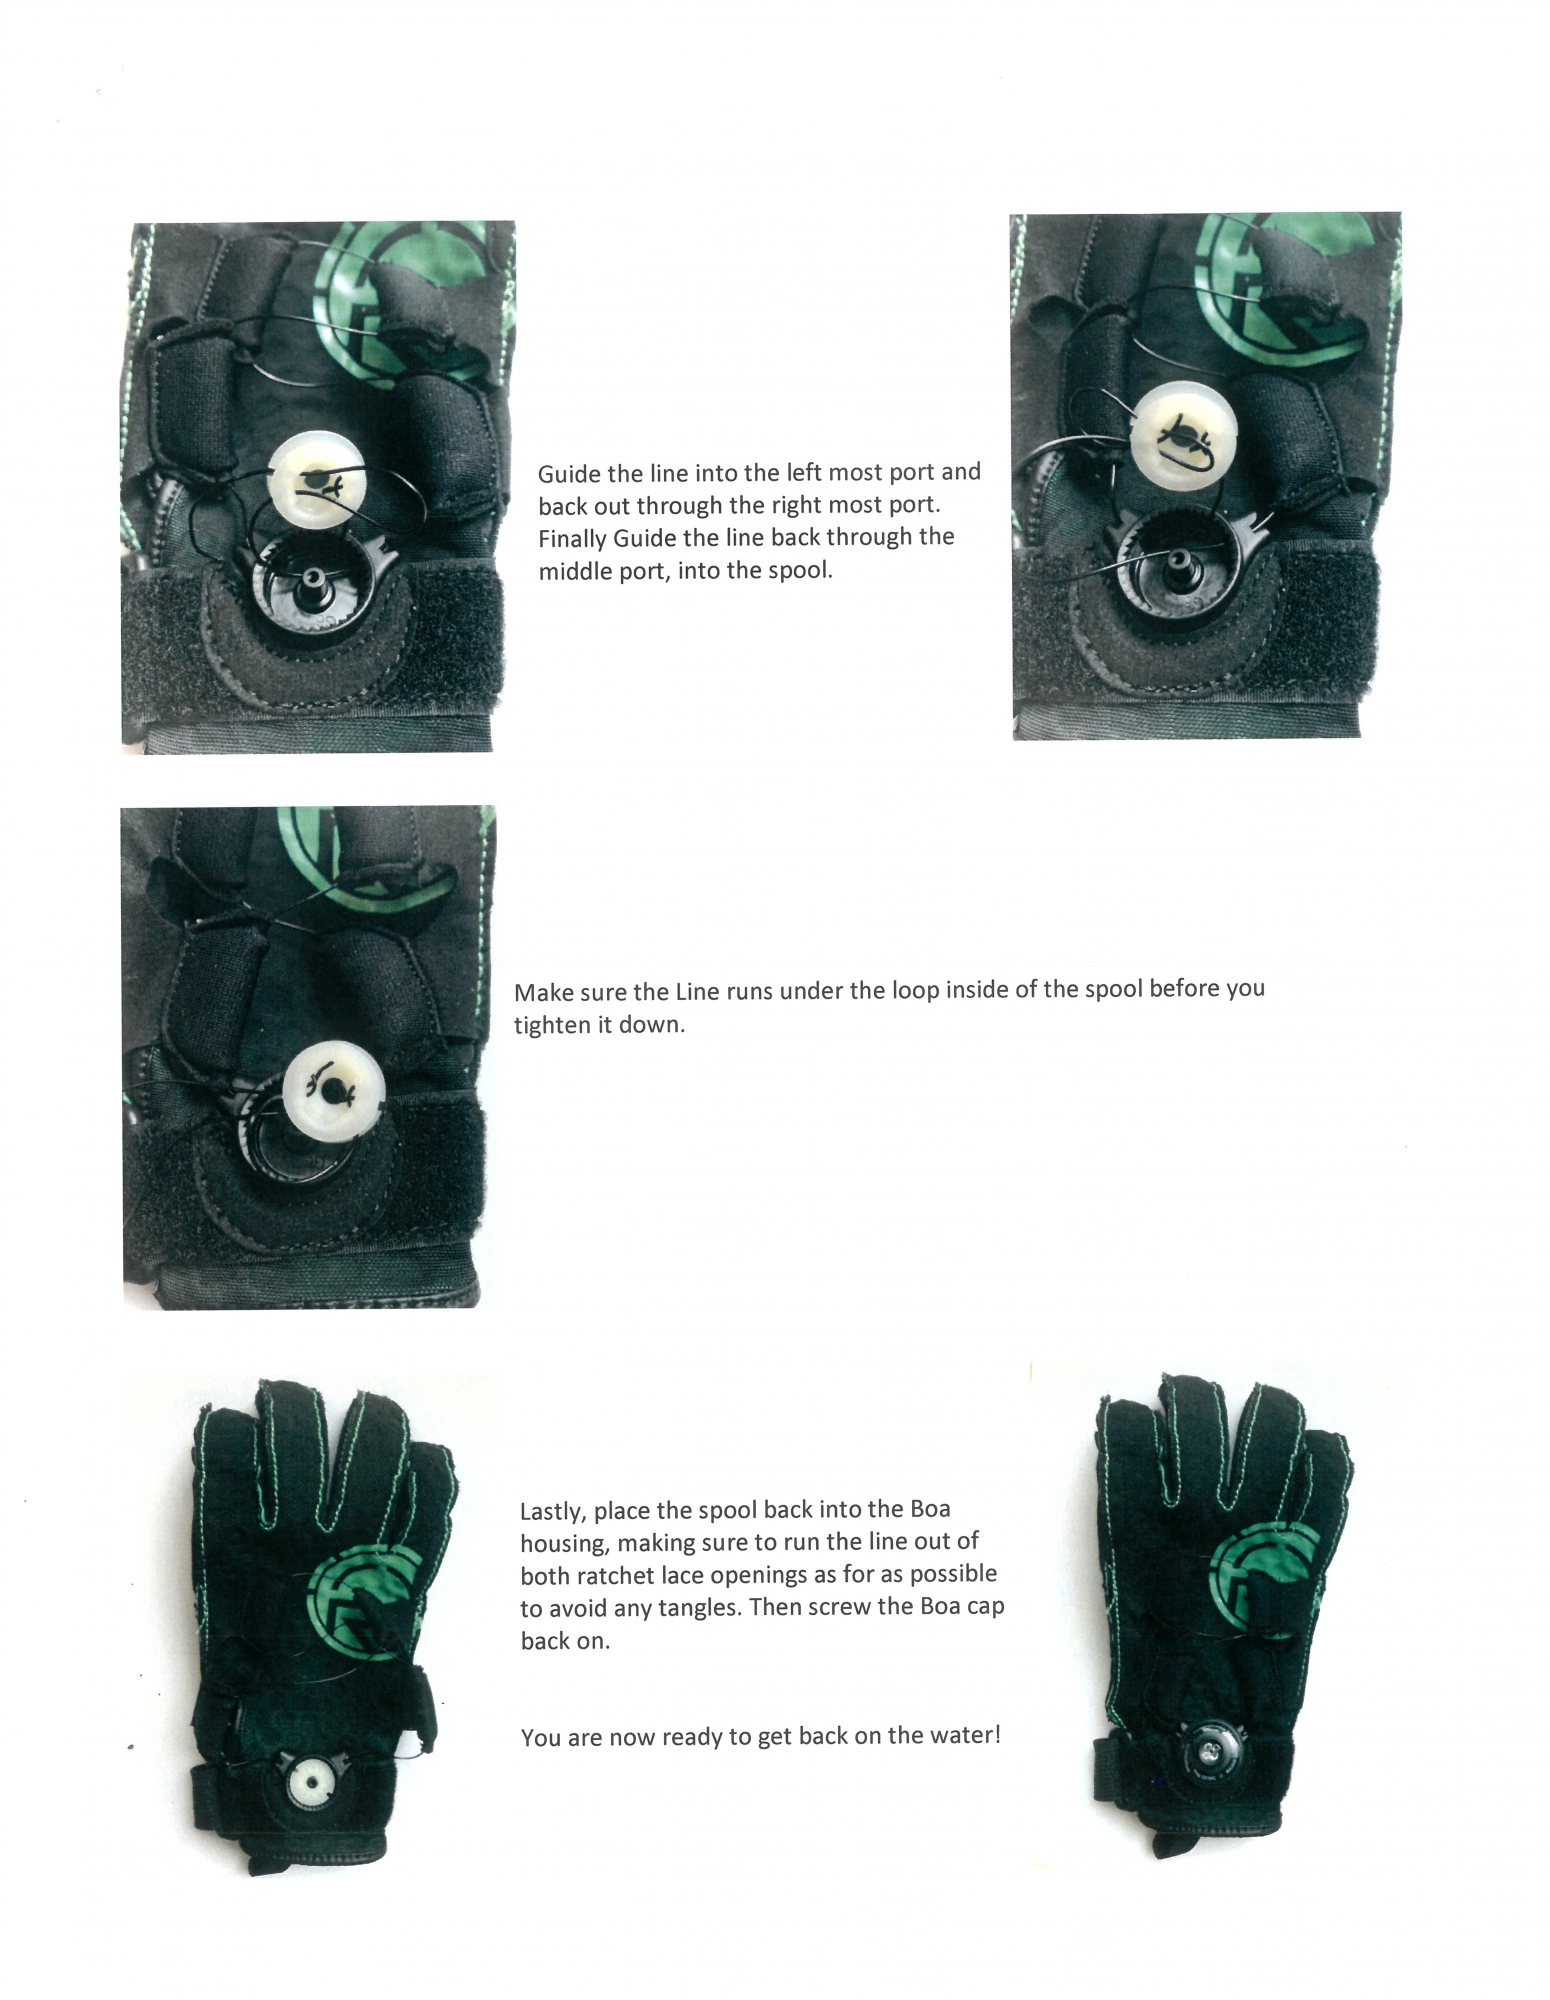
- The "Lock" Knot: This is the most important step. Feed the lace through the small hole on the spool, pull it around, and feed it back through the same hole (the "U-turn"). Pull it tight until it locks into the internal notch.
- Reassemble: Drop the spool back into the housing, replace the dial, and tighten the center screw. Give it a test click—if it spins freely and retracts the lace, you're back in action!
See below video for a clear illustration on how to do the “U-Turn”. It’s a snowboard video and not mine, LOL! But until I have time to put together a video this is the best one I have seen that shows how to do it quickly and clearly.